Wednesday, April 3, 2013

New frontiers

my new address: MarieYoungCreative.com


This is a good-bye of sorts. I've launched a new website at marieyoungcreative.com so I'm moving my blog to that address. Please come check it out! It won't be the same without you there.

I'm going to keep this content here. It has been such a labor of love that I don't want to lose it.

Monday, March 11, 2013

Seasonal Shake-up


March is an unpredictable month in Pennsylvania. Wednesday morning we woke to snow--about 6 inches coated everything. By afternoon it started to melt away. By Sunday, temps rose to close to 60 and we tasted spring.

I took advantage of the warmth, and the great seasonal light, to take some shots of a fall-themed black cat witch sculpture that I just finished. She is part of a larger work--more pics to come. In the meantime here's a look at where she started.


Saturday, March 9, 2013

Celestial Honors

Thanks to everyone who voted in the PCAGOE challenge. I am honored that my Celestial Sun and Moon Decorative Eggs tied for first place in the Members Voting category. Here's a link to see the full results: http://polymerclayartists.blogspot.com/2013/03/march-winners.html

I thought it would be nice to share with you one of my favorite entries this month: a delightful sculpture Moon Struck with Stars by Beckie of AuroraClayWorks.

Moon Struck with Stars by Beckie of AuroraClayWorks.
Beckie Fox, a sculptor of more than 35 years from Wasilla, Alaska describes her work as "certified Made in Alaska." So fitting! I love how even though I've never met Beckie, or been to Alaska, I can feel her spirit and the natural spirit of her home in her work. She is the same artist who made the delightful swap ornament with kids sledding that I shared in December. http://www.creativesprinkle.blogspot.com/2012/12/stories-in-polymer.html

Sunday, March 3, 2013

Vote and Win

Celestial themed polymer eggs by Marie Young Creative
Celestial Themed Polymer Covered Eggs

With Easter right around the corner, I'm in egg-covering mode.  I decided to take advantage of that creative rhythm and design a few eggs using theme from the Polymer Clay Artists Guild of Etsy March challenge: Celestial.

I started each egg by placing two small patches translucent Premo polymer where I wanted to stamp the sun and moon. Since the egg is curved the whole design wouldn't stamp, but that didn't matter because I planned to add layers on top of the celestial design so it would look like the sun and moon where bursting out of an active swirling solar system.

The color of the background comes from mokume gane slices layered over a dark blue. For the sun and moon areas, I painted alcohol inks over the stamped design on the translucent clay after baking. They appear to glow in contrast with the opaque blue background.  

Vote & Win
Voting is open through March 7. Select your favorites and you could be entered to win a prize from one of the sponsoring artists (including me!) Go here to vote:

http://polymerclayartists.blogspot.com/2013/02/celestial-march-challenge.html 

Friday, March 1, 2013

Studio Guest


This is my studio guest, Henry. He's our newest adoption, but he is little shy about integrating with our other cats so he's spending most of his time in my studio. There he has a comfy couch and a food bowl all to himself.

We have coffee together every morning before I head off to my day job. (I drink the coffee; he head-butts the cup and spills it on me). In the evenings he comes upstairs and sits on my husband's lap to watch television. The hissing and growling is subsiding when he's around the other cats so maybe I'll get my studio back soon.

Sunday, February 17, 2013

Aqua Color Palette

Art Deco aqua switch plate cover
Art Deco Aqua Switch Plate Cover

There is something about aqua that makes my heart sing! It can feel wonderfully vintage or fresh and modern.

In the top switch plate, I paired a simple translucent aqua inlay with a faux black mother-of-pearl background. My grandmother had the most amazing jewelry box made from black mother-of-pearl. I thought of it immediately when I sliced into the mokume gane clay sheet and revealed the scalloped design.

The bottom plate is a more modern geometric take where I added a few orange and blue inlay pieces in an asymmetrical pattern.

Both are available at: http://www.etsy.com/shop/YoungCreative


geometric switch plate
Modern Geometric Switch Plate Cover

Sunday, February 10, 2013

Angry Bird Near Cake Wreck

Angry Bird Space Cake Topper

When the request came in from my nephew to do an Angry Birds Space cake for his birthday, I have to admit that I had to do a little googling. Once I found a picture of a bird I liked, polymer seemed like the way to go to create a light-weight 3-d topper.

I had read a magazine article where an artist created doll heads by shaping a polymer sheet around a styrofoam ball so I decided to give that a try. Let's just say my first attempt didn't work out, but check out the cool texture on the broken pieces. There has to be a something cool that I can do with the shards.

For attempt two, I pulled out a glass Christmas ornament and pulled out the hanger. I shaped the bird's head feathers around the protruded part. I even added a small hook in the back to he can use the topper as a Christmas ornament later.

So what went wrong? When I shared the story in our forum for the Polymer Clay Artists Guild of Etsy, one of the women asked if I added an "exhaust vent." I had meant to add a hole at the base, but in my excitement to get it in the oven, I totally forgot. At least I was only on the base layer when it happened.

Live and learn!

Wednesday, February 6, 2013

Faux Granite Easter Egg

Faux Granite Easter Egg
When I wrote about this project last week in my post Faux techniques in polymer, I promised you a few tips on creating your own faux granite. Well here they are:

1. Create the polymer "granite" base layer. I've made some cool stone effects with tinted translucent clay and pepper flake inclusions, but in this I simply opened a packet of Premo Sculpey Granite and blended in a small amount of pearl and translucent premo to give it a nice soft feel.

2. After I covered the entire egg with the base polymer, I added accents with a flat extruded rope.

3. Add a stippled texture to the raw clay with a stiff wire brush. I also added a few "cracks" with a pointed sculpting tool.

4. Bake the granite layer.

5. Add depth to the granite layer with acrylic paint. Brush black or dark umber paint onto small sections making sure to get it into the crevices. Wipe it away immediately with a damp cloth leaving only a small amount in the recessed areas.

6. I finished the project off by adding a flowered vine and rebaking the egg.

Of course if you like this project, but don't feel like making your own, this one is for sale:
https://www.etsy.com/listing/121773536/easter-egg-victorian-gothic-decor-faux

Friday, February 1, 2013

Faux techniques in polymer

Faux Granite Decorative Egg by Marie Young Creative
Faux Granite Decorative Egg

Faux treatments are fun in polymer. So many options! That's why it made a great theme in this month's Polymer Clay Artists Guild of Etsy challenge.

Faux Granite
My entry features a faux granite treatment applied to a real chicken egg. I was going for a weathered granite, the kind that looks like it had been outside for ages. Stop back later in the week and I'll give you a few tips on creating this treatment.

Vote and Win
In the meantime head over to the PCAGOE challenge blog and vote for your favorites. Three lucky votes will win a mini shopping spree in one of our sponsor shops. Voting is open Feb. 1-7.


Wednesday, January 16, 2013

Making hollow egg shells blows

hand blown egg shells
Hand Blown Egg Shells

Hollow egg shells are such a great raw material, but collecting them, well, that BLOWS.

With Easter just a few months away I am doing what I should have been doing months ago--blowing out egg shells to use in my Easter projects.

Most of the time when I cook eggs I either poach them or hard boil them which means no chance at salvaging the whole shell. So when I encounter an opportunity to harvest a hallow shell, I jump at it. Whether it is baking a cake, making meatloaf, or scrambling up a quick frittata--my recipe start with "blow out an egg shell."

The method: One woman, one egg, and a pin

My method is simple in theory.
  1. Poke a hole in both ends (I use a thumbtack to start the hole, followed by a pin to burst the yoke).
  2. Blow
For a great hand-blown-egg tutorial that has pics of the pin method, check out "Baby Janyne's" blog. One disclaimer: The tutorial shows the egg streaming out of the tiny hole. That RARELY happens for me.

Do ladies blow?
The blowing process is extremely unladylike. Almost every egg I touch has some kind of clot that doesn't want to come through the hole. That means inevitably, my husband walks into the kitchen to find me blowing with all my might into a chicken egg. Let me just say, his crude jokes never get old.

I even picked up one of those hand-held suction thingys that moms use to suck snot out of their babies' noses because I read that you could use that to remove the yokes, but the clot still clogged the hole. Plus, when I used it, I got queasy picturing baby snot. There are also commercial blowing kits available, but I've never tried one.

Do you have a secret tool or method to blowing yolks out of egg shells? If so, PLEASE share!


Wednesday, January 2, 2013

Bat'leth Display Rack: a study in texture


You know the saying, "the shoemaker's children have no shoes," well in my home, that translated into the polymer artist's husband had no rack for his Bat'leth. Confused? Let me back up in this story.

bat'leth rack in use

My husband, Rob,  is a big Star Trek fan. He has a replica of a Klingon weapon known as a bat'leth that needed a proper display rack. He found a metal holder with sailboats on it that was the right size, but sailboats aren't very "Klingon" so he "commissioned" me to find polymer solution.

He gave me a print out of a symbol that he wanted me to include. That symbol, and the location of the screw holes, were the only real perimeters that I had to stay within.

I liked the antique gold feel of the metal so I used a blend of antique gold Premo to match it for the base. Once covered, the spaces between the three sailboats left a weird indentation that I could have leveled off with more gold clay, but I kind of liked the pattern. I decided to work it into the design by filling it in with chopped pieces of translucent clay that I later tinted with alcohol inks. It reminded me of a lava flow. Hot, Angry, and Klingon.

In my original plan, I wanted to have the Klingon symbol in the center, but I quickly realized the screw holes were in my way. I had no interest redrilling holes in metal so I opted to create two symbols, one at each end of the piece.

Rob is really happy with how it turned out and so am I. In fact, I've entered into this month's Polymer Clay Artists Guild of Etsy's Challenge: Texture.

Voting is open until Jan. 7. Pick your three favorites and you will be entered to win a prize of your choice. Vote here: http://polymerclayartists.blogspot.com/2012/12/january-challenge-texture.html


Tuesday, January 1, 2013

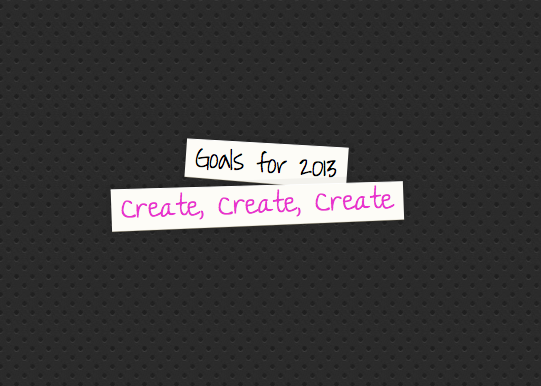
Create, Create, Create


Ah, a new year -- that time of psychological fresh starts. Who am I to fight against the tides of goals and resolutions?

Actually, I'm feeling pretty good about my path right now. If you remember January 2012, I outlined my BHAGs (Big, Hairy, Audacious Goals). Since BHAGS are by nature BIG, you don't achieve them in one year. I look at it as more of a 5-year plan. To recap, here is my BHAG:
"To live a creative, joyful, spiritual life as an artist and a writer"
I'm happy to say that I've taken some solid steps toward my BHAG in 2012. In 2013 I'll continue implementing practical, tactical goals like starting a newsletter, thanks to the advice of Alyson Stanfield of Art Biz Blog, but my big focus this year will be on creation.

So for 2013 it is Create, Create, Create!

Do you want to learn more about setting a BHAG? Then read my posts:

Don't Fear the BHAG

http://creativesprinkle.blogspot.com/2011/01/dont-fear-bhag.html


Debuting Today: Marie's BHAG
http://creativesprinkle.blogspot.com/2011/01/debuting-today-maries-bhag.html


Monday, December 31, 2012

Extruded Polymer Snowflake Tutorial


Polyform, the manufacturer of my favorite polymer clay: Premo Sculpey, hosts a "Make It Your Own" challenge each month. This month the inspiration piece was an extruded snowflake by Phoebe Doehring. You can view her project instructions here: http://www.sculpey.com/projects/extruded-snowflakes

I thought I'd share a quick look at how I adapted the project for my ornament (shown above). I started with the snowflake pattern but instead of circles and curves, I adapted the center to have more of a Pennsylvania Dutch floral pattern.

To create the snowflake, I placed the adapted pattern sheets under a piece of glass from an old picture frame, just like in Phoebe's instructions. I started with extruded strings like she did, but I used a much finer rope of White Transluscent Premo mixed with Premo's Frost White Glitter clay. Because I planned on placing my snowflake on a background, I didn't have to worry about the thickness. I also used my tiny Kemper flower cutter to add delicate accents and cutout shapes.


Once I filled in all of the lines with my extruded clay, I baked the whole thing on the glass sheet for 10 minutes at 270 degrees. I took it out of the oven immediately and used my cutting blade to lift it off the glass and onto an unbaked circle of Premo Blue Granite clay that I had shaped over a glass bowl. I pre-coated the blue circle with liquid polymer to get a good seal before layering the still-warm snowflake on top. Because the extruded snowflake had just come out of the oven, I could gently shape it to the curve of the base.


I baked the piece again for 30 minutes at 270 to cure the snowflake onto its new base. Next time I'd like to transfer the extruded snowflake onto a polymer-covered glass ball ornament. Wouldn't that be pretty?

Monday, December 24, 2012

Stories in Polymer

"Sled Fled" by Beckie of Aurora Clay Works
Madonna and child by Line of Play Sculpt Live

The arrival of two ornaments from my polymer guild's ornament exchange has been a bright spot in a sad week. These beauties were created by members of the Polymer Clay Artists Guild of Etsy

I love how both Beckie of Aurora Clay Works and Line of Play Sculpt Live can tell intricate stories through polymer.

Beckie, a proud Alaskan, perfectly captured the moment when two young rascals jump onto an unattended dog sled and take off in this highly detailed work. Line's piece, in contrast, uses a few subtle brush-like strokes to depict the tender embrace of the Mother and Child.  Lovely works! Thank you, ladies!!


Saturday, December 22, 2012

Saying Goodbye to Pumpkin


We said goodbye to our Pumpkin today.

He was almost 18 and had been in bad health, but we will miss him dearly. This was a picture of him a year ago enjoying one of his favorite activities: drinking dripping water from the faucet.

We adopted him 13 years ago from the Clearfield County SPCA along with his sister, Princess. Pumpkin was reaching out through the bars, meowing, and putting on quite the show in his effort to be adopted. Princess was hiding in the corner. They were a package deal so we agreed to take them both. Once home, Princess, came out of her shell and she is helping us through this painful time, along with Lucy, Benjamin, Emily, and Tucker.


Thursday, December 20, 2012

5 days till Christmas


Counting Down: 5 Days!

Dashing Dachshund Ornament

Wednesday, December 19, 2012

6 days till Christmas

Sexy Siamese
We are on the countdown to Christmas. 6 more days!!!

My talkative Siamese Emily was the model for this ornament that sits front and center on my tree. She is always striking a pose.


Tuesday, December 11, 2012

Ornament Swap


This lovely beauty arrived at my house yesterday--my reward for participating in the Polymer Clay Artists Guild of Etsy's Ornament Swap. I made three ornaments and sent them out, and now three ornaments should be finding their way to me.

This one, created by Jackie of ThePleasantPheasant is the first to arrive. It is stunning! The color is a gorgeous rosey-pink and the finishing is simply flawless. And there is a hidden "M" just for me! Thank you, Jackie!


Monday, December 10, 2012

Handcrafted Switchplate Sale


Closeout Sale

I'm streamlining my inventory to get ready for some new designs in 2013. That means select light switchplates are on sale for only $8 each. 

If you order this week, you could still get one in time for Christmas.
http://www.etsy.com/shop/YoungCreative

Saturday, December 8, 2012

Death by Idea


Ideas are fabulous, but they are also hazardous to your health.

Unorganized, unfulfilled ideas are a great source of stress for me. Sometimes my head gets so full that one more random thought that hits at 3 in the morning may as well be a sniper shot to the head.

I told you before that I'm a "notebook" girl--a notebook girl who likes to make lists. It is the only way that I feign sanity. But now my notebooks are running amok and have threatened my husband's sanity.  As my brain overflows, I drain the excess thoughts into a notebook. I have a notebook to capture each topic.

I keep them in an "orderly" stack on the coffee table until my cats jump up and knock over the stack. So honestly most days they are strewn around in a hot mess. What can I say, my surroundings reflect my emotional state.

Clean house = calm mind.
Chaotic house = chaotic mind.

So technology to the rescue. At least a for a test phase.

I "inherited" an iPad when my husband upgraded. I've adopted it as a high-tech notebook. Right now, I'm using the standard Notes app to keep lists on different topic areas -- one for blog ideas, one for my guild's challenge themes, and a couple for different product ideas.

Sure I could have been doing this on my laptop, but typing on a laptop feels too much like I'm at work. Ideas don't flow well in that type of environment. The iPad feels like my notebooks. Plus it is really easy to take it with me.

So if anybody has any tips on cool productivity or creative apps that I may want to check out. Let me know.


recomendations

share icons