Monday, October 29, 2012

Dreaming of a White Halloween

 Here's a sneak peak inside of the Halloween treat bags that I made for my niece and nephew. As you can see, I decided to go for a "White Halloween" theme centered around mummies.

Polymer clay mummy pens and ornaments.

Crepe-paper wrapped Hershey bars


Stamped white paper bags

Saturday, October 27, 2012

A Month of Creativity

November is almost here and that means Art Every Day Month.


The challenge
Art Every Day Month is the brainchild of artist Leah Piken Kolidas. Here is how Leah describes the low-pressure challenge that marks the event.

“ I encourage people to make something every day, but my goal is to foster more creativity, so if you make just one piece of art per week or just one for the whole month, that's fine with me. The idea is to bring more creativity into your life, not to make you feel overwhelmed, pressured or guilt-stricken.”
But I'm not an artist!
She defines art as anything creative, whether that be painting, drawing, knitting, sewing, cooking, decorating, writing, photography, clay, jewelry-making or whatever.

Sign-up
You can sign-up now to participate, or any time during the month. And don't worry about the pressure of "creating" every day. You can flow in and out as you need to. I have to admit, I didn't do a good job keeping up last year, but I have a better game plan for this time around.

Find out more: http://creativeeveryday.com/art-every-day-month


Wednesday, October 24, 2012

Cinnamon Cookie Polymer Clay Ornaments

cinnamon-polymer-clay-ornaments
"Cinnamon Cookie" polymer clay ornaments

Earlier this week, I shared how to make this cute and easy camo baby shower favor from an envelope and a little Duck tape. And as promised, now I'll show you how you can make these adorable "cinnamon cookie" ornaments from polymer clay.

"Cinnamon Cookies" Polymer Clay Ornaments
  1. Mix translucent polymer clay with a tiny amount of brown clay and a dash of cinnamon. If the blend seems dry, you can soften it with a drop of mineral oil.
  2. Roll out the "dough" using a rod or your pasta machine.
  3. Rub some more cinnamon over the top and cut out your shapes with a cookie (or clay) cutter.
  4. Add a hole for the ribbon. I used a small heart-shaped Kemper cutter.
  5. Take a specialty-shaped metal brad fastner used in paper crafts and cut off most of the length of the faster so it doesn't poke through the back of your ornament.
  6. Press the brad into the clay.
  7. Bake according to the clay brand's instructions and string on a ribbon.
If you like working with translucent clay and spices, you may also want to check out these posts.

http://creativesprinkle.blogspot.com/2010/02/clay-inclusion-technique.html
http://creativesprinkle.blogspot.com/2012/06/coloring-polymer-clay-cinnamon-bear.html

Monday, October 22, 2012

DIY Camo Baby Shower Favors

camo-baby-shower-favors
Cute and easy camo baby shower favors
My sister-in-law, Ericia loves camo; so much so that she and my brother used it as a theme for their fall wedding. Well now that we are getting ready to welcome a new baby into the family, we figured we'd stick with the theme for her baby shower.

These are camo baby shower favors that I made out of pink envelops and "camo" Duck tape. Wouldn't they be adorable for a military-themed shower.

Like them? Here's how you can make your own.

DIY Camo Baby Shower Favors


1. Pick out a long envelope with a nice weight to it. (These are A10 in "Blush")
2. Seal the empty envelope.
3. Wrap a strip of Duck tape across the center making sure it overlaps evenly in the back.
4. Cut the envelope in half with pinking shears.
5. Punch two holes in the top to thread the ribbon through.
6. Fill with a gift. I used snack-sized chocolate bars.
7. Tie shut with a pretty ornament. I make these out of polymer clay (of course!)

Check out this post to make the cinnamon cookie polymer clay ornaments.

Saturday, October 20, 2012

Tooth-cracking Evil Candy Apple

Evil-Candy-Apple-Polymer-Clay-sculpt-by-Marie-Young-Creative
Evil Candy Apple Polymer Clay sculpt by Marie Young Creative

My sister makes a tasty candy apple that begs to be bitten, but my version could break your tooth right off. This little meany is made from polymer clay. I created a few of these, along with some really cool mummies that I'll show you later,  as Halloween "treats" for my family.

Really when you think about it, he is actually a teeth-saver--NO SUGAR--and imagine the calories you save over the real thing.


Saturday, October 13, 2012

5 Polymer Clay Beginner Tips


Here are 5 things I wish I new when I first started with polymer clay.

1. Not all clay is the same

Different brands have different properties. Some are easy to work with, but brittle when baked. Others are stronger, but super tough to condition. Personally, I am most comfortable working with Premo Sculpey. I can buy it locally and it is very versatile. I also like the waxy finish of Cernit. Some people love Kato, but I find it has a chemical smell that I don't like.

Here's a good resource on types of clay.
http://www.polymertutorials.com/polymer-clay-types-tutorial.html

2. Conditioning matters
You have to work the clay by "conditioning" it in order for it to be strong and smooth. Don't try to short cut it.

This site offers some good conditioning tips.
http://www.polypediaonline.com/133688/Polymer-Clay-Conditioning

3. Not all finishes can be used
I learned this one the hard way. After creating a few pieces using chalks as accents, I spayed them with a clear sealer. Things seemed great until about a month later when they got sticky. Lesson: not all finishes work on polymer. Now most of the time I use a brush on finish, Pledge with Future Shine floor finish.  Most people who work with clay refer to this as "Future floor wax."

Here is a good forum chat on finishing:
http://www.polymerclaycentral.com/cyclopedia/finishingtips.html

4. Sanding matters
If you are a good sander, and your project doesn't use lots of textures, paints or powders, you can great a great finish just by sanding and buffing. The key is patience and lots of fine grit sandpaper grades ranging from 400-2000.

You can find some finer grades in hardware or auto parts stores, but I find that I have to order online to all of the different grades.

Here is a good site outlining how to use the different grades for sanding success:
http://www.polymerclayweb.com/Tools/Supplies/Sandpaper.aspx

5. Banning fingerprints
Sanding can remove some fingerprinting, but it is better not to leave prints in the first place. You can remove prints before baking with cornstarch, baby powder, baby oil, or mineral oil.

Here are some tips on preventing finger printing:
http://www.beadsandbeading.com/blog/fingerprints-polymer-clay-beads/93/

Friday, October 12, 2012

Costume Time

I started pulling together the pieces to my costume for a post-Halloween party I'm going to in November. Tucker is modeling the wig. He looks good in drag!

Wednesday, October 10, 2012

Positive Panties

Today I want to give a shot out a fellow Pennsylvania girl, Amanda Oakes, and her business partner, Jenn Gibson, for coming up with one of those "damn, I wish I'd have thought of that" ideas.

Amanda and Jenn have a Kickstarter project out there to raise funds for a new venture that creates panties to get your day off to a good start. I loved the sales pitch so much I have to become a project backer!

"We've all been there – rolling out of bed, feeling disgruntled and cranky. Inhaling coffee, stumbling into the shower...

Maybe you didn't get enough sleep, you aren't feeling well, the J.O.B. or class is the last place you want to be, the kids are fighting, your to-do list is a mile and a half long, the list goes on and on...

You're blowing through your moments not really being present at all.

Now imagine in your frenzied rush rifling through your underwear – seeing the date night panties, the everyday panties, the period panties, the oh-damn-it's-way-past-laundry-day panties – and then your eye catches your Positive Panties.

You smirk, you smile, you pause. In that moment you are reminded that you have the power to choose. You have the power to create your day."

They are accepting pledges from backers through Kickstarter through Oct. 31. Good luck to them!
http://www.kickstarter.com/projects/prettyfnmess/did-you-put-on-your-positive-panties-today

Saturday, October 6, 2012

Small Scale Letter Stamping

As writer I'm used having my name attached to my work, but for some reason it seems more natural for me to "sign" my writing than my art.

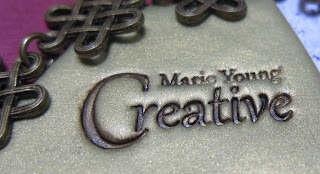
The lettering from my new stamp is only 1-inch across!


The last time I signed my creative work was in my high school art class. Part of my apprehension is the fact that I hate my handwriting. I don't want to ruin a perfectly fine piece with a messy signature. Well that won't be an issue with my new signature stamp by Jet Stamp.

I read about these amazingly detailed, yet tiny stamps in the last issue of The Polymer Arts magazine. Sage Bray gave them a great review for use with polymer clay. They also work for ceramic artists.

I had already been playing around with a graphic treatment for my shop name so this seemed like a great way to execute on the idea. I sent my sample Jet Stamps and they helped me fashion it into a 1-inch stamp. I've already incorporated my new stamped "logo" into the graphics for this Creative Sprinkle blog, my YoungCreative facebook page, and my YoungCreative Etsy shop.


To use the stamp:
1. Stamp into the raw clay.
2. Bake the clay.
3. Highlight the words by adding paint to the baked design and wiping any excess so the paint is only left in lettering.

I love it for my signature logo, but it would work great to create word or saying stamps in a small scale that you may not be able to find commercially.  Visit Jet Stamps.com to check out the option.


recomendations

share icons